


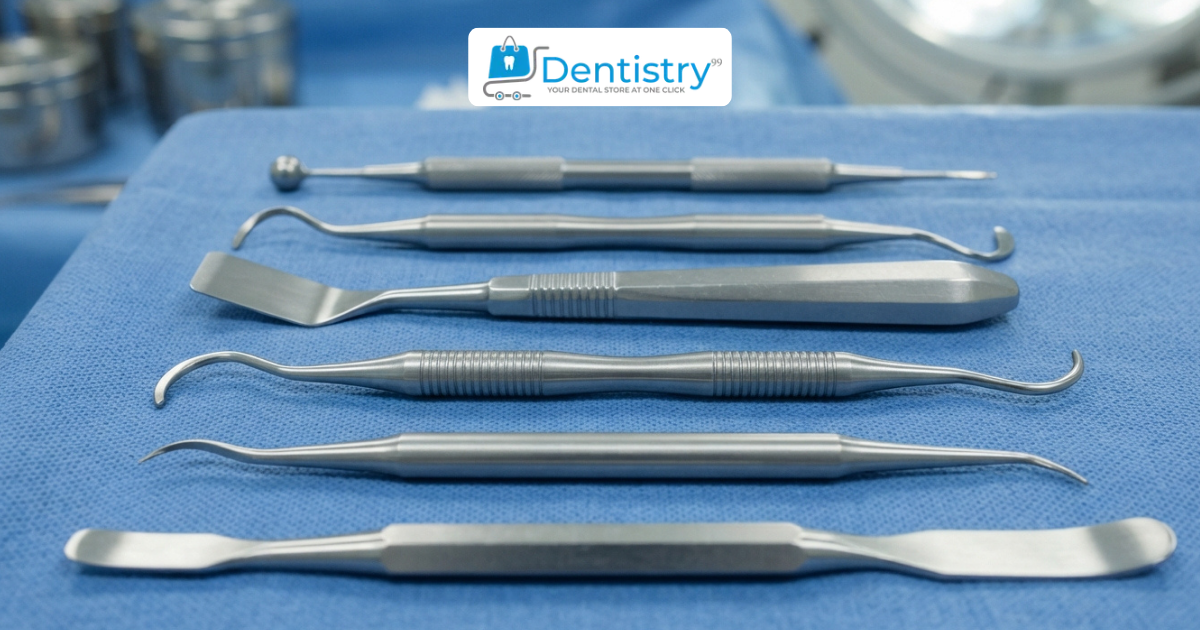
If you've ever reflected a mucoperiosteal flap during an extraction or an implant case, you already know how much the right instrument matters. At Dentistry99, we talk to clinicians every day who want tools that lift tissue cleanly without tearing it, and the periosteal elevator sits right at the center of that. This guide covers what the instrument actually does, where it's used, which types are worth knowing, how to use one properly, and how to keep it working well for years.
What Is a Periosteal Elevator?
A periosteal elevator is a hand instrument used to separate the periosteum, the thin fibrous membrane covering bone, from the bone surface underneath. Once that layer is lifted, the clinician can raise a full thickness flap, see the bone clearly, and work with a controlled surgical field.
It helps to be clear about this early on: a periosteal elevator is used for tissue reflection, not for moving or loosening a tooth. That job belongs to a luxator or an extraction elevator. Mixing up the two is one of the more common mistakes new clinicians make when stocking a tray, so it's worth separating them from the start.
Most dental periosteal elevator designs share a few common features. A textured or knurled handle gives a secure grip, the shank is shaped to reach into confined surgical sites, and the working end is either pointed for initial tissue engagement or rounded and blunt for lifting the flap margin. These instruments are typically made from stainless steel or titanium, and many come as double ended designs so one instrument can start and finish the reflection.
So whenever someone asks what a periosteal elevator is used for, the answer almost always comes back to the same core function: lifting soft tissue cleanly off bone so the surgery can move forward with as little trauma as possible.
Where Periosteal Elevators Are Used in Clinical Practice
A periosteal elevator isn't built for a single procedure. The same basic lifting motion supports several different areas of oral and maxillofacial work.
1. Tooth Extraction and Surgical Access
Before forceps or elevators can properly engage a tooth, the gingival attachment and periosteum usually need to be detached first. This is especially true for surgical extractions, where a flap needs to be raised for access. A periosteal elevator creates that initial opening and gives the clinician a clear path to the tooth or root.
2. Periodontal Surgery
Flap surgery, crown lengthening, and osseous procedures all rely on a clean, full thickness flap. Periosteal elevators make that reflection possible without shredding the tissue or leaving ragged margins that slow healing and complicate closure later.
3. Implant Placement
Before an osteotomy site is prepared, the surgeon needs a clear view of ridge contour and bone width. A periosteal elevator exposes that anatomy so the implant can be positioned accurately, which is why it shows up in nearly every implant kit on the market.
4. Bone Grafting and Sinus Lifts
Grafting procedures and sinus lifts depend on a soft tissue pouch that stays intact while material is placed. A periosteal elevator helps create and hold that space without perforating the membrane, since a perforation here can compromise the whole procedure.
5. Cyst and Lesion Removal
When a cyst or lesion needs surgical access, the periosteal elevator is usually the first instrument to touch bone, opening the area so the lesion can be visualized and removed safely.
Types of Periosteal Elevators (Seldin, Molt, Buser, PR3 & More)
Not every periosteal elevator is shaped for the same job. Blade angle, width, and tip design all change how the instrument behaves once it's in tissue.
Seldin Elevators. Best for Precision Tissue Separation
The Seldin design pairs a thin, semi-sharp end with a broader blunt end, so one instrument can start the reflection and then lift the flap. The Seldin 23 pattern in particular is known for clean, controlled tissue separation in extraction and periodontal flap cases, especially where the priority is precision rather than broad reflection.
Molt Elevators. Best for Flap Reflection
The Molt elevator is probably the most recognizable periosteal elevator in general oral surgery. Its spoon shaped, rounded end hugs the bone surface as it advances, which makes it a dependable choice for routine flap reflection across a wide range of extraction and periodontal cases. Molt 9 is the familiar workhorse pattern, while Molt 24 offers a more refined working end for finer control.
Buser Elevators. Best for Implant & Soft Tissue Work
Buser style elevators are popular in implant dentistry because they give excellent tactile control in delicate soft tissue without feeling bulky. Surgeons often reach for a Buser elevator specifically when ridge visualization needs to stay clean and minimally invasive, particularly in esthetic zone cases where tissue handling affects the final result.
PR3 Elevators. Best for Advanced Flap Reflection
The PR3 pattern is built for more demanding flap work, where a slightly heavier, more thorough reflection is needed without giving up control. It's commonly used in grafting and regenerative cases that call for broader tissue access.
Most practices don't rely on a single style. A mixed set covering Seldin, Molt, Buser, and PR3 designs handles nearly everything that comes through the operatory.
Stainless Steel vs. Titanium Periosteal Elevators. Which Is Better?
This is one of the most practical buying questions, and the honest answer is that it depends on your case volume and priorities.
Factor | Stainless Steel | Titanium |
Weight | Heavier | Noticeably lighter |
Edge retention | Good, sharpens easily | Very good, holds an edge longer |
Corrosion resistance | Good with proper care | Excellent, resists pitting over time |
Feel in hand | Solid, familiar | Lighter, less hand fatigue on long cases |
Typical use case | General, everyday practice | Implant surgery, longer procedures |
Cost | Lower | Higher upfront |
Stainless steel periosteal elevators remain the traditional standard. They hold an edge well, are easy to sharpen, and tend to be more budget friendly when you need several instruments. Titanium periosteal elevators are lighter, which helps reduce hand fatigue during longer surgical days, and they hold up better against corrosion over time.
Neither material is universally better. A busy implant focused practice often leans toward titanium for the weight and durability, while a general oral surgery tray may still favor stainless steel for cost and familiarity.
How to Use a Periosteal Elevator Without Tearing the Flap
Most technique problems with a periosteal elevator come down to control, not strength.
Proper Grip & Angle
Hold the instrument in a modified pen grasp, with the blade kept flat against the bone rather than angled into the tissue. The goal is to stay on bone for the entire motion instead of digging into soft tissue.
Step by Step Technique
Start with a clean, well planned incision. The elevator can't make up for a poor flap design.
Insert the tip at the incision line and seat the blade flat against bone.
Use small, controlled sweeping or rocking motions instead of forceful prying.
Advance the reflection gradually, working in sections rather than trying to lift the whole flap at once.
Pause if you feel resistance. That usually means the edge is dull or the angle is off, not a sign to push harder.
Common Mistakes to Avoid
Letting the blade tip into soft tissue instead of staying flat on bone, which is what causes tears and buttonholing
Using more force instead of checking the angle or the sharpness of the blade
Trying to reflect too large an area in one motion
Working with a dull periosteal elevator and compensating with pressure
A well handled periosteal elevator should feel like it's peeling tissue off bone, not prying it apart.
Periosteal Elevator vs. Luxator vs. Extraction Elevator
These three instruments show up together constantly, but they do different jobs.
Instrument | Main Job | Working End | How It's Used |
Periosteal elevator | Reflects soft tissue off bone | Sharp and blunt ends | Pushed along bone in controlled strokes |
Luxator | Severs periodontal ligament fibers before extraction | Thin, sharp, slightly curved tip | Worked gently into the PDL space |
Extraction elevator | Luxates and elevates the tooth or root | Wider, sturdier tip | Used with leverage against tooth and bone |
If the task in front of you is exposing bone or reflecting a flap, reach for a periosteal elevator. If the task is loosening or removing a tooth, you need a luxator or an extraction elevator instead. Keeping this distinction clear matters when you're building out a tray, since each instrument earns its place at a different step of the procedure.
Shop Our Top Periosteal Elevators
Every periosteal elevator in the dentistry99 collection is crafted from premium medical-grade stainless steel or titanium, fully autoclavable, and designed for the tactile control surgeons demand. Here's our lineup:
Seldin 23 — Precision Tissue Separation
The trusted classic for extractions and flap surgery. Dual-ended design handles both initiation and reflection.
Shop: Seldin 23 Periosteal Elevator
G 24 Titanium — Advanced Soft Tissue Management
A lightweight titanium workhorse engineered for smooth, atraumatic tissue handling across surgical and periodontal procedures.
Shop: G 24 Titanium Periosteal Elevator
Buser Titanium — Precision Soft Tissue Separation
The implantologist's choice. Ultra-thin tip for delicate reflection around osteotomy sites and esthetic-zone implant surgery.
Shop: Buser Titanium Periosteal Elevator
PR3 Titanium — Advanced Flap Reflection
Modern geometry for complex regenerative cases. Consistent feedback, progressive reflection, and excellent edge retention.
Shop: PR3 Titanium Periosteal Elevator
Molt 9 Titanium — Superior Flap Reflection
The classic spoon-shaped Molt design in featherweight titanium — perfect for wide, smooth flap elevation.
Shop: Molt 9 Titanium Periosteal Elevator
Molt 24 Titanium — Precision Flap Reflection
A refined Molt pattern delivering superior control in confined surgical sites, built in corrosion-resistant titanium.
Shop: Molt 24 Titanium Periosteal Elevator
How to Choose the Right Periosteal Elevator for Your Practice
By Procedure Type
General extractions usually call for a Molt style elevator. Implant and grafting cases tend to benefit more from a Buser or PR3 profile. Precision anterior or periodontal work often favors a Seldin design.
By Blade Shape
Narrower, angled blades work well in tight or delicate areas. Broader, rounded blades are better suited to larger flap reflections where more surface contact helps the instrument glide.
By Handle Grip & Comfort
A balanced, comfortable handle cuts down on hand fatigue during longer cases. Titanium instruments tend to feel lighter overall, which matters most for practices running back to back surgical procedures.
How to Sharpen a Periosteal Elevator
Signs It Needs Sharpening
The blade drags instead of gliding smoothly along bone
You're applying more pressure than usual to get the same result
Tissue reflection feels rougher or less predictable
The tip looks visibly rounded, nicked, or worn under light
Step by Step Sharpening Process
Identify the instrument's original bevel angle and plan to preserve it. This is the part that matters most.
Use a fine grit sharpening stone and move in consistent, light strokes along the bevel.
Avoid removing more metal than necessary, since aggressive sharpening shortens the life of the instrument.
Inspect the edge under good light or magnification once you're done, to confirm it's even.
If the blade is pitted, bent, or heavily worn, sharpening won't fix it. Replacement is the better call at that point.
A lot of practices choose professional sharpening services over doing it in house, since getting the bevel angle wrong can permanently change how the instrument performs.
Cleaning, Sterilization & Storage
After Every Use
Rinse the instrument right away so blood and debris don't dry onto the blade. Clean it with a neutral pH detergent and a soft brush, and run it through an ultrasonic cleaner when one is available before drying it fully.
Sterilization Guidelines
Follow your facility's standard autoclave cycle for stainless steel or titanium surgical instruments, and always keep instruments separated, ideally in a cassette, so the blade edges don't knock against each other during processing.
Long Term Storage Tips
Store periosteal elevators in a dry, organized cassette rather than tossed loose into a tray, where tips can bump against heavier instruments and dull faster than they should. Good storage is one of the easiest ways to extend the working life of any dental periosteal elevator.
When to Replace Your Periosteal Elevator
Even with careful maintenance, no instrument lasts forever. It's usually time to replace a periosteal elevator when:
The blade shows pitting, corrosion, or discoloration that cleaning won't remove
The tip is bent or the blade no longer sits flush against a flat surface
Sharpening no longer restores a clean, gliding edge
The handle feels loose, cracked, or uncomfortable to hold through a full procedure
Working with a worn instrument doesn't just slow you down. It raises the risk of flap tears and unnecessary tissue trauma, which is a bigger cost than the instrument itself.
FAQs About Periosteal Elevators
What is a periosteal elevator used for?
It's used to lift and separate the periosteum from bone, which lets a clinician reflect a clean surgical flap during extractions, periodontal surgery, implant placement, and bone grafting procedures.
How do you use a periosteal elevator?
Keep the blade flat against bone and use small, controlled sweeping or rocking motions to reflect tissue gradually. Avoid forcing the blade into soft tissue.
How often should it be sharpened?
There's no fixed schedule. Sharpen it whenever the blade starts dragging, needs extra pressure, or shows visible dullness or nicks on inspection.
Is a periosteal elevator the same as an extraction elevator?
No. A periosteal elevator reflects soft tissue off bone, while an extraction elevator is used to luxate and remove teeth or root structure.
Which type is best for implant surgery?
Buser style periosteal elevators are widely preferred for implant cases because they give precise control in delicate soft tissue without extra bulk.
Titanium or stainless steel, which lasts longer?
Titanium tends to resist corrosion better over time and stays lighter through repeated sterilization cycles. Stainless steel is easier and cheaper to sharpen and replace. In practice, how long either one lasts depends more on care and sterilization habits than on the material alone.
Final Thoughts: Choosing the Right Periosteal Elevator
A periosteal elevator does its work before almost anything else can happen in oral surgery, quietly but critically. Choosing the right type for the procedure, using proper technique, and keeping the instrument sharp and well maintained all affect how cleanly a flap reflects and how smoothly the rest of the case goes.
Explore the full range of periosteal elevators at Dentistry99, including the Seldin 23, Molt 9 Titanium, Molt 24 Titanium, Buser Titanium, G 24 Titanium, and PR3 Titanium, to find the right fit for your practice.
Dentistry99 Store
Need supplies for your practice?
Shop trusted brands with free standard shipping on qualifying orders.


