


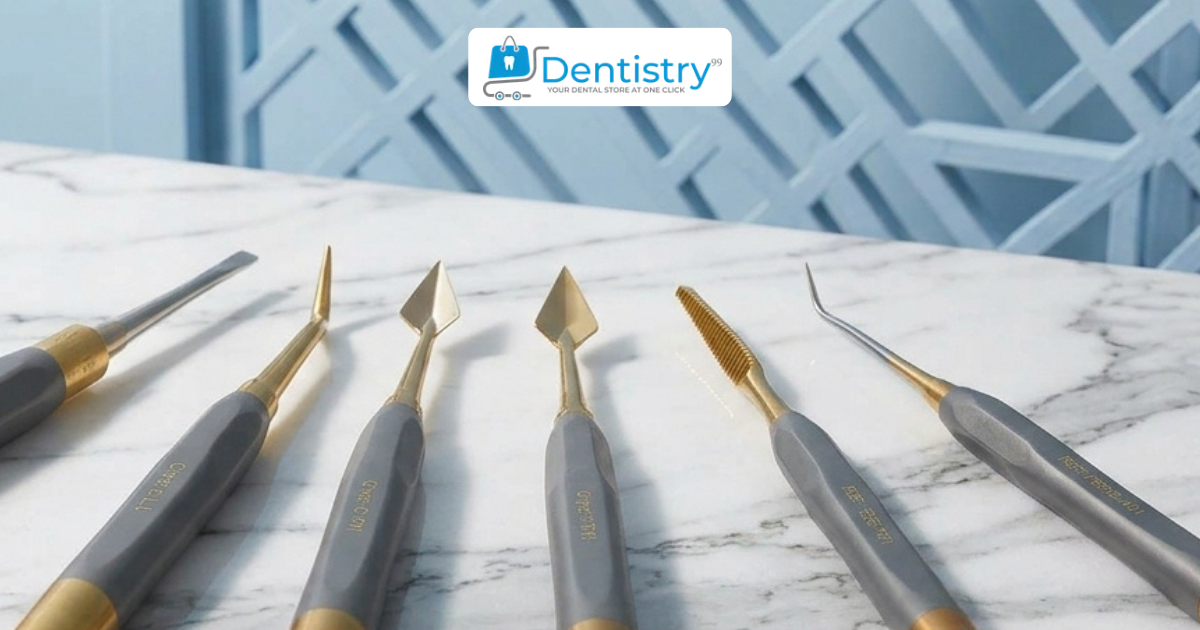
A surgical bur or a dental chisel is what actually cuts through the tooth and splits it into sections, and a dental elevator is what comes in right after to separate and lift those pieces out. If you've ever wondered why an extraction kit has so many different-looking instruments in it, this is why — cutting and lifting are two different jobs, and dentistry uses two different tools for them.
If you're stocking up for your operatory, you'll find the full range of extraction and sectioning tools — burs, elevators, chisels, and periotomes — in our dental instruments collection. But before you add anything to cart, it helps to actually understand what each instrument does and when you'd reach for it. That's what this guide walks through.
What Does It Mean to Split or Section a Tooth?
Tooth sectioning (also called splitting) is exactly what it sounds like — dividing a tooth into two or more pieces before it comes out of the socket. Instead of trying to pull an entire multi-rooted molar out in one piece, which can mean a lot of force and a higher risk of fracturing the root or damaging the surrounding bone, the tooth is cut into smaller sections first. Each section is then removed individually, which is usually far more controlled and far less traumatic for the patient.
It's worth separating two ideas that often get blurred together: cutting the tooth apart is one step, and elevating (lifting/loosening) the resulting pieces is a completely separate step. They just happen to occur back-to-back in the same procedure.
Why Do Dentists Split or Section Teeth?
Multi-Rooted or Fused Teeth
Molars and premolars often have two or three roots that splay outward in different directions. Trying to extract a molar whole means fighting against all of those roots at once. Sectioning the crown from the roots — and sometimes splitting the roots from each other — lets each piece come out along its own natural path.
Impacted Wisdom Teeth
Third molars that are impacted (angled, partially erupted, or stuck under the gum and bone) are one of the most common reasons for tooth sectioning. Cutting the crown away from the roots reduces the amount of bone that needs to be removed to get the tooth out.
Preserving Alveolar Bone
Every bit of bone that's shaved away during a difficult extraction is bone the patient has to heal, and bone that may matter later if they're planning an implant. Splitting the tooth into manageable pieces means less force and less bone removal overall.
Reducing Extraction Force on Fragile Teeth
Teeth that are heavily restored, root-canal treated, or weakened by decay can crack unpredictably under heavy extraction force. Sectioning takes a lot of that force out of the equation by letting you remove small, controlled pieces instead of wrenching out one large, brittle structure.
Which Instrument Actually Splits a Tooth? (The Direct Answer)
This is the part most guides gloss over, so let's be precise: the instrument used to split teeth is a rotary surgical bur (or, less commonly today, a chisel and mallet). Dental elevators don't cut the tooth — they go in after the cut is made to separate and lift the sectioned pieces free. If you only remember one thing from this article, make it that distinction, because it changes which tool you reach for at which stage of the procedure.
Surgical Burs and Handpieces — The Cutting Instrument
A surgical bur for tooth sectioning, mounted in a straight or surgical handpiece, is the go-to instrument for cutting through enamel, dentin, and roots. Tungsten carbide and diamond burs are both used depending on how fast and how precise the cut needs to be — tungsten carbide tends to cut efficiently through tooth structure, while diamond burs offer finer control for delicate sectioning near the gumline or bone. This is genuinely the instrument used to split teeth in the vast majority of modern extractions.
Chisels and Mallets — Traditional Hard-Tissue Sectioning
Before high-speed handpieces became standard, a dental chisel for splitting teeth — tapped with a surgical mallet — was the primary way to section hard tissue. You'll still see chisels used today for certain bone-splitting and ridge-expansion procedures, and some surgeons prefer them for specific root-splitting techniques. They're slower and more technique-sensitive than a bur, which is part of why bur sectioning has largely taken over as the default.
Dental Elevators: Separating and Elevating the Sectioned Tooth
Once the tooth has been cut into sections, dental elevators for tooth splitting cases take over. An elevator works on simple leverage — the blade is wedged into the periodontal ligament space or between root fragments, and a rotational or wedging motion gradually loosens and lifts the piece free of the socket. This is the instrument that finishes the job the bur started.
Cryer Elevators for Root and Molar Separation
The Cryer elevator is probably the most recognizable name in root elevation. Its triangular, pointed tip is built to slide between two sectioned roots and apply rotational force that pries them apart — exactly the shape you want once a molar has already been split in half.
Best Cryer Elevator #45, 1/Pk — a solid general-purpose choice for posterior sectioned-root elevation.
Best Cryer Elevator #44, 1/Pk — angled for mesial root elevation where access is tighter.
Left & Right Cryer Elevators for Targeted Access
Cryer elevators also come in mirrored left and right versions, because the angle you need to reach a distal root on one side of the mouth is the opposite of what you need on the other side. Having both in your kit means you're never fighting the wrong angle mid-procedure.
Best Cryer Elevator #1L, 1/Pk — shaped for left-side distal root access.
Best Cryer Elevator #1R, 1/Pk — the mirror-image counterpart for right-side access.
Serrated Elevators for Secure Grip During Elevation
A serrated dental elevator adds fine ridges to the working tip, which bite into the tooth or root surface and reduce slipping during elevation — especially useful on smooth, rounded root fragments where a plain-tipped elevator can skate right off.
Best Serrated Elevator #4L, 1/Pk — a broader working surface for cases needing more leverage.
Best Serrated Elevator #3mm, 1/Pk — a narrower tip that fits into tight interdental spaces.
Periotomes: Atraumatic Separation Around the Ligament
A periotome is a thin, blade-like instrument that's worked down along the periodontal ligament rather than against the bone. It's not designed to section a tooth at all — its job is to sever the ligament fibers holding the tooth in place, which loosens the tooth with minimal pressure on the surrounding bone. Periotomes are a favorite for atraumatic extractions, particularly when the socket needs to stay as intact as possible for an immediate implant.
Bur vs. Chisel vs. Elevator: Which Do You Need?
Instrument | Function | Best Used For |
Surgical bur | Cuts through tooth structure | Sectioning multi-rooted molars, impacted wisdom teeth |
Dental chisel & mallet | Cuts hard tissue manually | Traditional sectioning, select bone-splitting cases |
Dental elevator | Separates and lifts sectioned pieces | Post-sectioning root and tooth removal |
Periotome | Severs the periodontal ligament | Atraumatic extractions, implant-site preservation |
The short version: burs and chisels are cutting tools, elevators are lifting tools, and periotomes are ligament tools. None of them fully replace each other, which is why a well-stocked extraction tray usually has all four.
How to Choose the Right Elevator for the Case
Picking the right elevator isn't just a matter of grabbing whatever's closest on the tray. A few things worth thinking through before you start:
Root position — mesial roots and distal roots often call for differently angled tips.
Access angle — tight posterior spaces may need a narrower, more angled elevator than an anterior extraction would.
Left vs. right design — mirrored elevators exist specifically so you're not forcing an awkward angle on one side of the arch.
Fragment size — smaller sectioned fragments generally do better with a finer, more precise tip; larger fragments can handle a broader blade.
Grip needs — if a root surface is smooth and prone to slipping, a serrated elevator will usually give you more control than a plain one.
Matching the elevator to the case is really what separates a quick, controlled elevation from one that drags on and stresses the surrounding bone.
Best Practices for Safe and Precise Tooth Splitting
Use controlled, deliberate force. Rushing an elevation is one of the fastest ways to fracture a root tip and turn a routine extraction into a longer one.
Confirm the sectioning is complete before elevating. Trying to lever apart tooth structure that isn't fully cut through puts unnecessary strain on the instrument and the bone.
Keep instruments sharp and properly maintained. A dull elevator tip needs more force to do the same job, which works against the whole point of sectioning.
Sterilize between every use. This one shouldn't need saying, but it's worth repeating — proper autoclave cycles for every instrument, every time.
Reach for the periotome first when preserving the socket matters. If an implant is planned, atraumatic technique upfront saves complications later.
If you're building out or refreshing your instrument tray and want a general buying checklist beyond just this procedure, our post on 7 points to consider before purchasing dental instruments online is worth a look.
Common Mistakes to Avoid When Sectioning a Tooth
Using an elevator to force apart a tooth that isn't fully sectioned. This is the single most common cause of unplanned root fracture.
Grabbing the wrong angle (left vs. right) out of habit. It slows you down and increases the chance of slipping.
Applying force against the bone instead of along the root's natural path. This is where unnecessary bone loss usually comes from.
Skipping periotome use when bone preservation actually matters for the case. Not every extraction needs one, but implant cases usually do.
Letting bur cuts go too shallow or too deep. An incomplete cut leaves you fighting the elevator; an overly deep cut risks damaging adjacent structures.
FAQs
Which instrument is designed to split teeth?
A surgical bur, used in a dental handpiece, is the instrument primarily designed to split or section a tooth. Chisels and mallets can also cut through tooth structure, though this is less common today. Dental elevators are used afterward to separate and remove the sectioned pieces.
What is a Cryer elevator used for?
A Cryer elevator is used to separate and lift sectioned tooth roots, particularly in multi-rooted molars. Its pointed, triangular tip wedges between root fragments and applies rotational leverage to loosen them from the socket.
Are dental elevators used to split teeth, or just to remove the pieces?
Dental elevators don't split or cut the tooth. Their job starts after sectioning — they separate and elevate the pieces the bur or chisel has already cut, loosening them for removal.
What's the difference between a Cryer elevator and a serrated elevator?
A Cryer elevator has a smooth, pointed, triangular tip built for wedging between root fragments and applying rotational force. A serrated dental elevator has fine ridges on the working tip that grip the tooth surface more securely, which helps prevent slipping on smooth or rounded fragments.
When should you use a #1L vs. #1R elevator?
The #1L and #1R are mirrored versions of the same design, meant for opposite sides of the arch. Use the #1L for left-side distal root access and the #1R for right-side distal root access — matching the elevator to the side keeps your working angle natural instead of awkward.
Conclusion
The instrument used to split teeth is a surgical bur (or, in some cases, a chisel and mallet) — not a dental elevator. Elevators separate and lift the sectioned pieces afterward, forceps grip and pull a whole tooth out, and burs are what create the sections in the first place. Knowing which tool belongs at which stage is what makes a sectioning procedure fast, controlled, and easy on the patient.
At Dentistry99, we stock the full lineup — Cryer elevators, serrated elevators, and everything else you need for a well-equipped extraction tray.
Dentistry99 Store
Need supplies for your practice?
Shop trusted brands with free standard shipping on qualifying orders.


